DESIGN PRINCIPLES - PROJECT 1 - SELF-PORTRAIT
18 Jan 2023 ~ 1 Feb 2023 / Week 2 ~ Week 4
Lee Kai Jin / 0354707 / Bachelors of Mass Communication (Hons) (Digital Media
Production)
Design Principles / Taylor's University
Task (Exercises / Project):
Project 1 - Self-portrait
LECTURES
Week 2 (Wed, 18 Jan 2023): Assignment Brief
We took quite a long time in reviewing the exercise task, therefore Dr Yip uploaded a video briefing in Microsoft Teams to introduce the assignment requirement for this project.
In this project, we are required to design a self-portrait of ourselves. So far the design do not have any specific requirement and we are free to create any design we like. However, must make sure the journey of how the design came out must be clear and recorded in the blog.
Week 3 (Wed, 25 Jan 2023): Design Review
Dr Yip give some feedback and suggestion on student's study and sketches.
Week 4 (Wed, 1 Feb 2023): Design Review
Dr Yip give some feedback and suggestion on student's study and sketches.
INSTRUCTIONS
PROJECT 1 - SELF-PORTRAIT
 |
| Fig. I_2.0, Mind map about me, week 2 |
Below is my exploration of idea for this project and example I found online.
As mentioned in the mind map, I love blue and purple colour scheme. However, I feel like it is quite difficult and not suitable for me to use these colour scheme as the overall portrait might look depress.
In colour theme wise, I decided to keep it simple and easy, but using the theme of Sarawakian element (as my family closer to my mom's side). One of the most iconic one is the Dayak pattern.
 |
| Fig. I_2.1, Example of Dayak traditional pattern, week 2 https://www.pinterest.com/pin/102808803973268525/?mt=login |
 |
| Fig. I_2.2, Example of Dayak traditional pattern, week 2 https://in.pinterest.com/pin/29766047527909901/ |
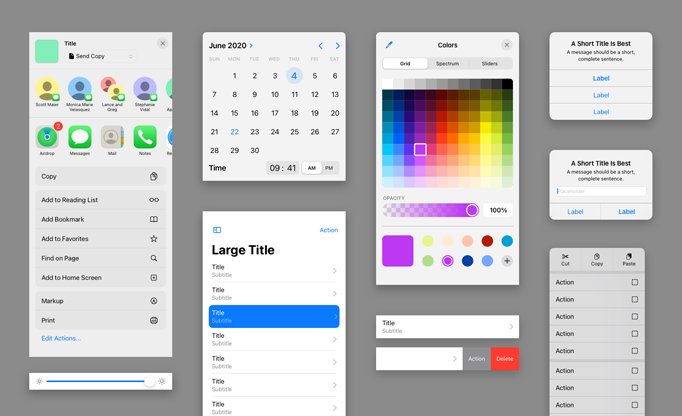 |
| Fig. I_2.3, Apple UI design, week 2 https://developer.apple.com/design/ |
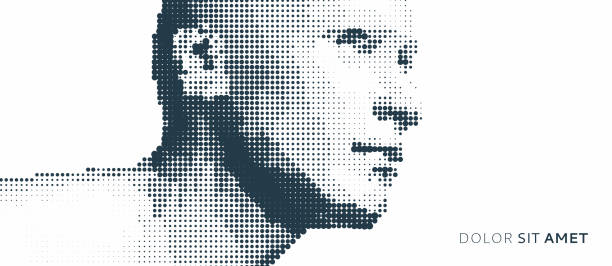 |
| Fig. I_2.4, Example of pixelated portrait in one colour, week 2 https://www.istockphoto.com/vector/abstract-man-head-made-from-dots-side-view-of-dotted-face-background-facial-gm1353813183-428803816 |
 |
| Fig. I_2.5, Example of 8-bit characters, week 2 https://www.pinterest.com.au/pin/331718328789899104/ |
 |
| Fig. I_2.6, Example of pixelated character in vintage game style, week 2 https://www.pinterest.com/pin/face-8-16-bit-pixelart-portraits-8-bit-pixel-8bit-pixel-game-legos-pixelated--406520303858442978/ |
Of course, the character should have some element of accessories. I think include some icon or accessories related to my hobby is a good idea.
I chose this selfie of myself for tracing it in digital form
 |
| Fig. I_3.0, The selfie I took for this project, week 3 |
To make the process of pixelated easier, I decided to trace the original picture in chiaroscuro.
 |
| Fig. I_3.1, Example of chiaroscuro, week 3 de Botak.jpg |
 |
| Fig. I_3.2, Tracing outline, week 3 |
 |
| Fig. I_3.3, Drafting layer and colour, week 3 |
 |
| Fig. I_3.4, Add in shadow, week 3 |
 |
| Fig. I_3.5, Drawing face, week 3 |
 |
| Fig. I_3.6, Detail adjustment, week 3 |
Actually, I love the chiaroscuro style so much and I decided to keep it like that, other elements only use pixelated style.
 |
| Fig. I_3.7, Pattern designing, week 3 |
 |
| Fig. I_3.8, See how can the pattern goes in the design, week 3 |
 |
| Fig. I_3.9, Make some effect that the pattern crossing the character like strap, week 3 |
 |
| Fig. I_3.10, Adjusting the layout using rule of third, week 3 |
 |
| Fig. I_3.11, Effect of the "strap", week 3 |
I am considering using dark colour background too so the portrait shows emphasis, balance and contrast.
After consult Dr Yip, she says that the "strap" thing is good but it is too outstanding compared with the portrait. Therefore, she suggest to make it thinner and stick it at the border vertical or horizontally.
 |
| Fig. I_4.0, Amendment of the "strap", week 4 |
 |
| Fig. I_4.1, Use the original picture as background, week 4 |
 |
| Fig. I_4.2, Add a white border to make the character more emphasis, week 4 |
 |
| Fig. I_4.3, Change some colour, week 4 |
Final Submission of Project 1: Self-portrait
 |
| Final submission of Project 1: Self-portrait in .jpeg |
Final submission of Project 1: Self-portrait in .pdf
Rationale of design:
The colour scheme of the portrait is the colour scheme of the Sarawak flag, and also there is a simple design pattern that emphasise my cultural background.
FEEDBACK
Week 3: Feedback of idea exploration
General Feedback: Special and unique idea.
Specific Feedback: Can try to use the Dayak pattern as frame or design but not making it too upstanding as the portrait is the main.
Week 4: Feedback of first draft
General Feedback: The "strap" is too outstanding.
Specific Feedback: Thinner the "strap" (cut it in half) and use it as frame at the border, or include it in the shirt or hat as part of the design.
REFLECTIONS
Experience:
This is the first time I "draw" my self-portrait actually.
Observations:
I did some studies on Dayak design pattern and it suit my taste.
Findings:
It is important for someone else to give opinion on our design before we finalise it.
FURTHER READING
Non-Designer's Design Book by Robin William
 |
| Fig. FR_1.0, Non-Designer's Book by Robin Williams |
This book is very good for beginner or people that is not in design field to understand the design principles.


Comments
Post a Comment